If you’re a developer looking for a robust and flexible headless CMS, Strapi is an excellent choice. Strapi provides a powerful and customizable framework that allows you to create, manage, and distribute content across various platforms. In this blog post, we’ll walk through the process of setting up your first Strapi app using PostgreSQL as the database.
What is Strapi?
Strapi is an open-source, Node.js-based headless CMS that offers a rich API and an intuitive admin panel. Its primary goal is to enable developers to create customizable and scalable APIs with minimal effort. Whether you’re building a website, mobile app, or any other type of digital project, Strapi provides the tools you need to manage your content effectively.
Prerequisites
Before we dive into setting up your first Strapi app with PostgreSQL, ensure you have the following installed on your machine:
Node.js (version 18.x or 20.x)
npm (Node Package Manager, version v6 and above)
Git (optional but recommended for version control)
PostgreSQL (ensure it’s installed and running)
* Supported PostgreSQL database required version | Minimum 11.0. Recommended 14.0
You can verify the installation of Node.js and npm by running the following commands in your terminal:
node -v
npm -v
Additionally, ensure PostgreSQL is installed and running by checking the service status or connecting to the database using a client like PgAdmin.
Step 1: Create a New Strapi Project with PostgreSQL
With the NPM installed, you can now create your first Strapi project. Navigate to the directory where you want to create your project and run:
-
npx create-strapi-app@latest websparks-strapi-project
Replace websparks-strapi-project with your desired project name. The CLI will prompt you to choose a template and a database for your project.
Select the following options:
Choose your installation type: Custom (manual settings)
Choose prefered language: TypeScript
Choose your default database client: postgres
Database name: your_database_name
Host: 127.0.0.1 (or your PostgreSQL server’s IP address)
Port: 5432 (default PostgreSQL port)
Username: your_database_user
Password: your_database_password
Enable SSL connection: No (unless your setup requires it)
The CLI will then install the necessary dependencies and set up your project structure. This process might take a few minutes.
Step 2: Start the Strapi Server
Once the installation is complete, navigate into your project directory:
cd websparks-strapi-project
Start the Strapi development server by running:
npm run develop
This command will build and start the Strapi server. By default, the server runs on http://localhost:1337.
Step 3: Access the Admin Panel
After starting the server, open your web browser and navigate to http://localhost:1337/admin. You will be greeted with the Strapi welcome page, where you can create your first admin user.
Fill in the required details (username, password, email) and click “Let’s start”. Once you register, you will be directed to the Strapi admin panel.
Step 4: Create Your First Content Type
In the Strapi admin panel, you can create and manage content types. To create a new content type:
Click on the “Content-Types Builder” in the left sidebar.
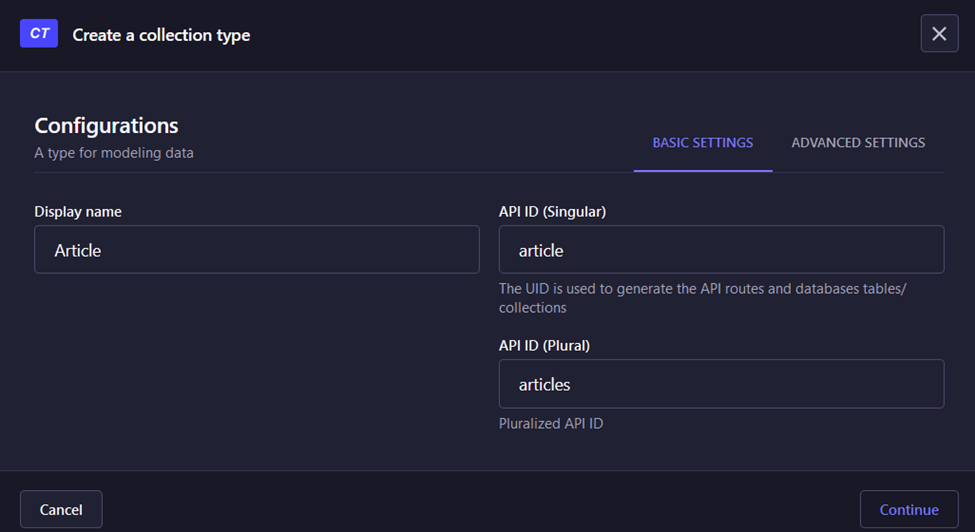
Click the “Create new collection type” button.
Enter a name for your content type (e.g., Article) and click “Continue“.
Add fields to your content type by clicking the “Add another field” button. For example, add fields like
Title (Text),
Content (Rich Text)
Slug (Text)
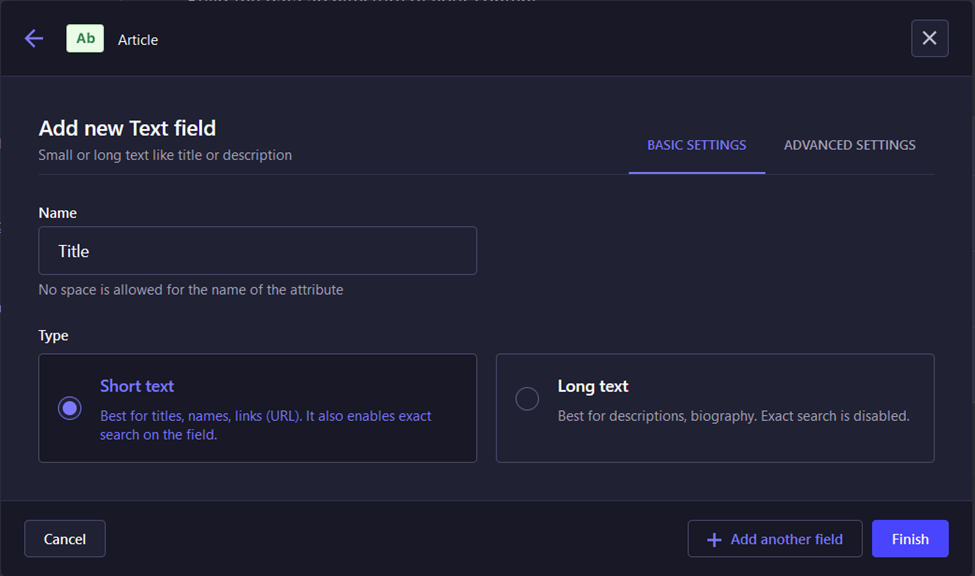
Once you’ve added all desired fields, click “Save” in the top right corner.
Strapi will automatically create the necessary API endpoints for your new content type.
Step 5: Add Content
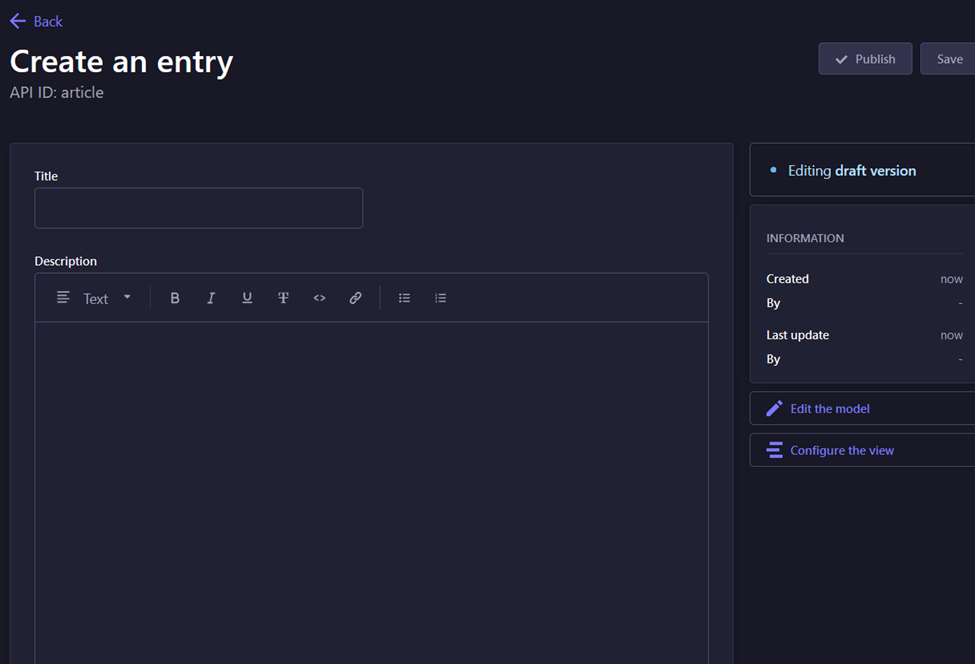
Now that you have your content type, you can start adding content. To do this:
Click on “Content Manager” in the left sidebar.
Select your content type (e.g., Articles).
Click “Add New Articles” and fill in the fields with your content.
Click “Save” when you’re done.
Don’t forget click “Publish” the article.
Step 6: Access Your Content via the API
With content added, you can access it via Strapi’s RESTful API. We need to set permission for this API first.
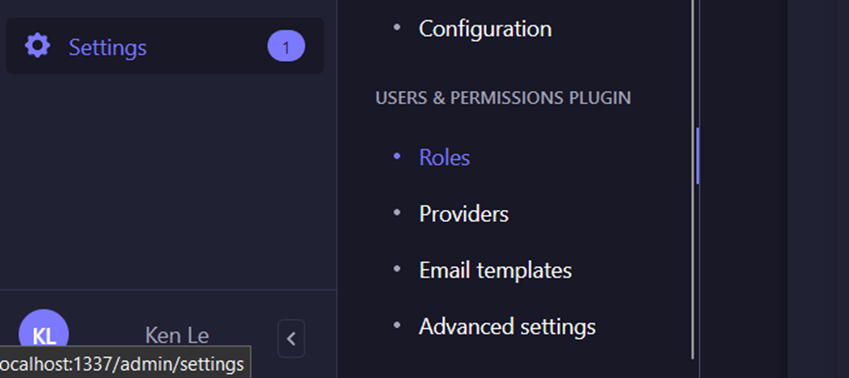
Click Settings. Below Users & Permissions plugin section, click Roles.
Click Public role > Select Articles below Permissions section > Tick find and findOne.
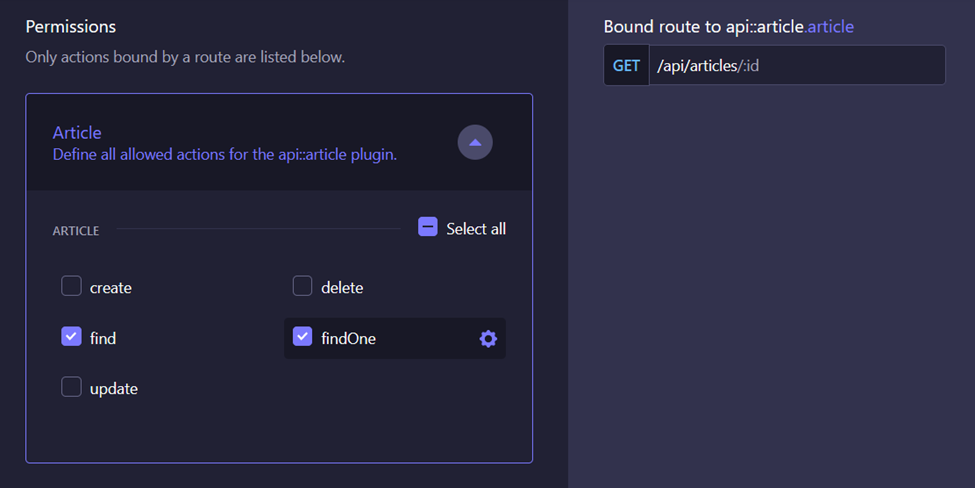
Click Save.
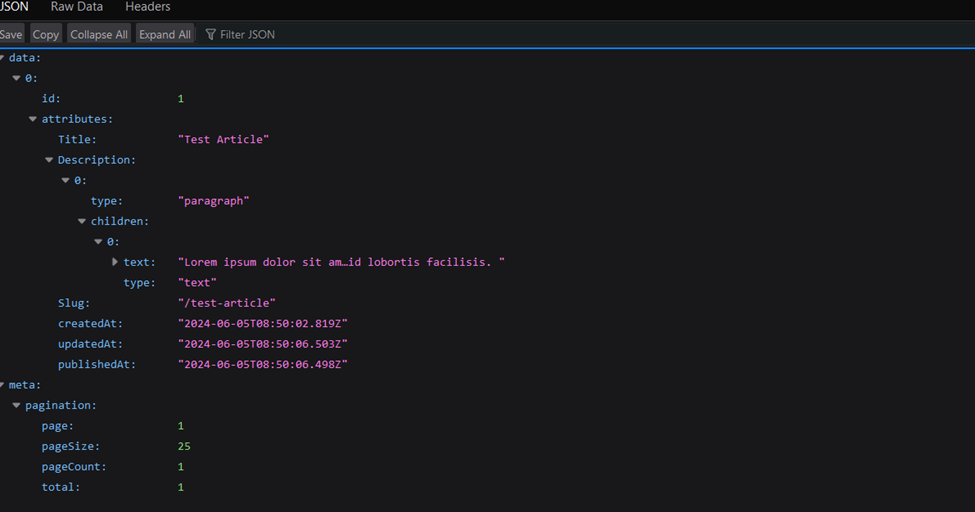
Now, We can open your browser or an API client like Postman and navigate to http://localhost:1337/api/articles to see your content.
Conclusion
Congratulations! You’ve successfully set up your first Strapi app with PostgreSQL. You’ve learned how to install Strapi, create a project with PostgreSQL, add a content type, and manage content through the admin panel. Strapi’s flexibility and ease of use make it a powerful tool for any developer looking to build content-rich applications.
This article is written by Ken Le, a Sitefinity and .Net Core developer from Websparks.
Strapi is an open-source headless CMS.
Find out more about headless CMS.