Pre-requisite
Install Slow-Cheetah Nuget
Here we go
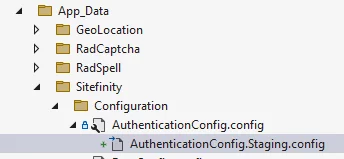
1/ In the Visual Studio Solution Explorer, navigate to App_Data -> Sitefinity -> Configuration folder
Note: Include the folder in the Visual Studio project, if not already included
2/ Create a new file for the config that needs transformation. The file name should follow the convention
<ConfigName>.<Stage>.config (Ex. PagesConfig.Staging.config)
3/ Right-click the new file and click Properties
4/ Set the Build Action to Content
5/ Install SlowCheetah
6/ Add a transform file of config. e.g. Authentication.Staging.config

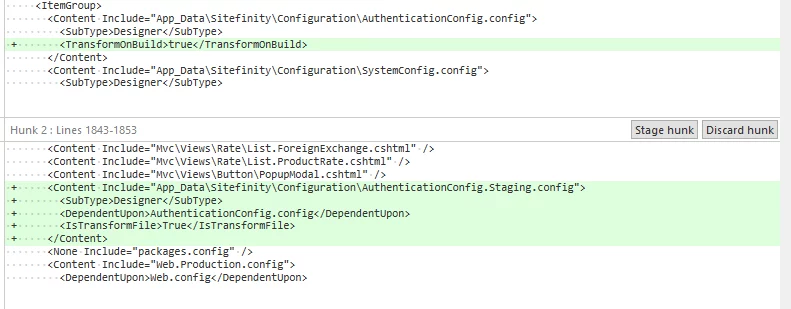
7/ Check the .csproj, ensure the root config, e.g. AuthenticationConfig.config contains
<TransformOnBuild>true</TransformOnBuild>
and the created AuthenticationConfig.Staging.config contains
<DependentUpon>AuthenticationConfig.config</DependentUpon>

<IsTransformFile>True</IsTransformFile>
8/ Publish the project with proper Build Configuration.
References
This blog originally appeared on Hawjeh blog.


